悪魔の数字サイトを作ってみたその2
前書き
この記事は,SLP KBIT Advent Calendar 2020 の6日目の記事です。 adventar.org 先にその1を閲覧することをお勧めします。
cd-donki-gorira.hatenablog.com
目次
本編
hello_controller.rb
このファイルは、受け取ったデータを処理するファイルとなっています。 ソースコードが以下のものとなります。
class HelloController < ApplicationController
  #protect_from_forgery

  #正しい誕生日を入力しているか判断
  def eroor_birthday(mouth,day)
    if mouth.to_i == 2 && day.to_i > 29 then
      return -1
    elsif mouth.to_i == 4 && day.to_i > 30 then
      return -1
    elsif mouth.to_i == 6 && day.to_i > 30 then
      return -1
    elsif mouth.to_i == 9 && day.to_i > 30 then
      return -1
    elsif mouth.to_i == 11 && day.to_i > 30
      return -1
    end
    return 0
  end
  #6の倍数以外の処理
  def not_six(mouth,day)
    sum = mouth + day
    six_six_2 = (mouth*2 + day*2)
    six_six_3 = six_six_2 * 3
    ans = six_six_3 / sum
    @str1 = 'だけど、初めに' + mouth.to_s + ' × 2' + ' + ' + day.to_s + ' × 2をし,' + six_six_2.to_s + 'になる'
    @str2 = '次に' + six_six_2.to_s + ' × 3を行い、' + six_six_3.to_s + 'になる'
    @str3 = '最後に' + sum.to_s + 'でわると' + ans.to_s + 'になる'
    @str4 = 'よって、悪魔の数字である!'
  end

  #悪魔の数字か判断
  def jugde(mouth,day)
    if mouth.to_i == 6 && day.to_i == 6 then
      return mouth + '月も' + day + '日も、6です。悪魔じゃん。'
    elsif mouth.to_i % 6 ==0 && day.to_i % 6 == 0 then
      return mouth + '月も' + day + '日も、6の倍数なので悪魔の数字です。あなたは、めちゃくちゃ不幸です。'
    elsif mouth.to_i % 6 ==0 then
      return mouth + '月は、6の倍数なので悪魔の数字です。あなたは、不幸です。'
    elsif day.to_i % 6 == 0 then
      return day + '日は、6の倍数なので悪魔の数字です。あなたは、不幸です。'
    elsif mouth.to_i == 2 && day.to_i == 29 then
      return 'うるう年じゃなーか!悪魔じゃん!!'
    else
      not_six(mouth.to_i,day.to_i)
    end
    return  '6の倍数じゃねーじゃん!面白くねーなぁ(´・ω・`)'
  end

  #メインで動かしているところ
  def index
    if request.post? then
      @title = '悪魔による結果です'
      @image = "fantasy_succubus.png"
      if params['s1'] && params['s2']
        @msg =  params['s1'] + '月' + params['s2'] + '日ですね'
        if eroor_birthday(params['s1'],params['s2']) == 0 then
          @result = jugde(params['s1'],params['s2'])
        else
          @result = '西暦のことも分かんねーのか?クズ'
        end
      else
        @msg = 'not selected...'
      end
    else
      @title = '悪魔の数字サイトへようこそ'
      @image = "character_akuma.png"
      @msg = 'select List...'
    end
  end
end
今回、HelloController < ApplicationControllerで既存のクラスの機能を継承して新しいクラスを作成しています。
コントローラのクラスは、基本的にApplicationControllerを継承させると良いです。
def indexの中身についてですが、受け取った誕生日を元に条件分けを行っています。条件ごとに文字列やファイル名を@~に返却しています。
def not_sixでは、いちゃもんを考え文字列を複数返却し、それらを組み合わせて無理やり文章にしています。
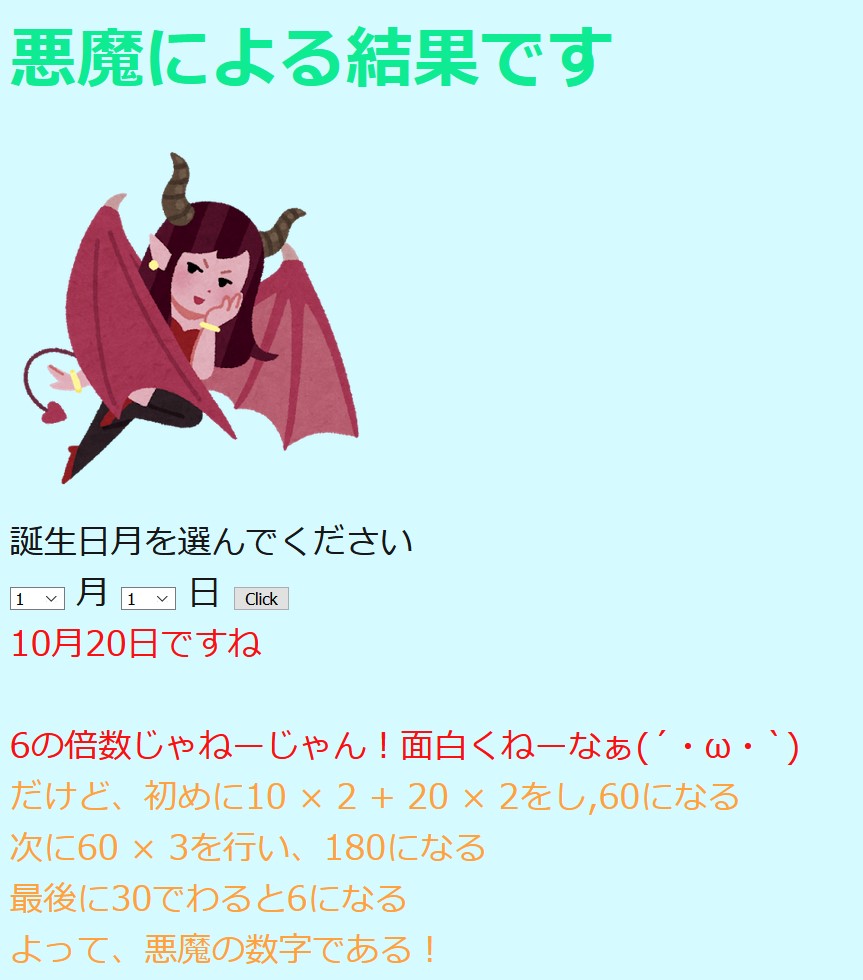 こんな感じでメッセージを返します。画像は、1パターンしか載せてませんが、メッセージは何パターンか用意してます。
index.html.erb
このファイルは、アプリ内の画像やテキストやボタンの位置などのレイアウトを設定するファイルです。
ソースコードは、以下のようなものとなっています。
<h1 class="display-4"><%= @title %></h1>
<div>
  <%# app/assets/images %>
  <%= image_tag @image, alt: "Rails icon", id: "assets", class: "image", width: "300px" %>
</div>
<p1><%= '誕生日月を選んでください' %></p1>
<%= form_tag(controller: "hello", action: "index")do %>
  <%= select_tag('s1',
    options_for_select(["1","2","3","4","5","6","7","8","9","10","11","12"])) %>
  <%= '月'%>
  <%= select_tag('s2',
    options_for_select(["1","2","3","4","5","6","7","8","9","10","11","12","13","14","15","16","17","18","19","20","21","22","23","24","25","26","27","28","29","30","31"])) %>
  <%= '日'%>
  <%= submit_tag("Click") %>
<% end %>
<p2><%= @msg%></p2><br><br>
<p2><%= @result%></p2><br>
<p3><%= @str1%></p3><br>
<p3><%= @str2%></p3><br>
<p3><%= @str3%></p3><br>
<p3><%= @str4%></p3><br>
初めにclassにdispaly-4と言う値を設定しています。これは、Bootstrapというフレームワークを使用しているためだそうです。
<%# app/assets/images %>は、画像を置いてるフォルダを指定しており、<%= image_tag @image, alt: "Rails icon", id: "assets", class: "image", width: "300px" %>で画像を表示しています。
selct_tagでは、誕生月と日の選択肢を設定しています。[]の中身を変更することで、選択肢を変更することができます。
<h>や<p>のようなタグは、見出しと文字列の塊を表しています。
hello.scss
このファイルは、装飾を行うためのファイルです。今回は、文字の色大きさを設定しています。
body {
  color: rgb(23, 23, 23);
  font-size:28px;
}
h1 {
  color: rgb(15, 235, 147);
  margin: 25px 0px;
}
p2 {
  color: rgb(250, 16, 16);
}
p3 {
  color: rgb(255, 161, 60);
}
color: rgbは、色を指定しています。RGBで指定を行っているので、赤と緑の青の割合で決定します。
font-sizeとmarginは、文字のサイズを設定しています。
application.html.erb
このファイルは、Webページ全体のレイアウトを記述するファイルであり、Railsアプリでデフォルトで使うものとなっていま。
ソースコードは、以下のようになっています。
<!DOCTYPE html>
<html>
  <head>
    <title>RailsApp</title>
    <%= csrf_meta_tags %>
    <%= csp_meta_tag %>

    <%= stylesheet_link_tag 'application', media: 'all', 'data-turbolinks-track': 'reload' %>
    <%= javascript_pack_tag 'application', 'data-turbolinks-track': 'reload' %>

    <link rel="stylesheet"
      href="https://stackpath.bootstrapcdn.com/bootstrap/4.3.1/css/
        bootstrap.css">
  </head>

  <body class="container">
    <%= yield %>
  </body>
</html>
色々書いていますが、今回は<link rel="stylesheet"
href="https://stackpath.bootstrapcdn.com/bootstrap/4.3.1/css/
bootstrap.css">と<body class="container">を追記するだけで大丈夫です。
前者の文を追記するだけで、CDNからBootatrapのスタイルシートを読み込むことができます。
後者の文は、Bottstrapを使うためのお約束だそうです。
routes.rb
このファイルは、ルーティング情報を割りてるファイルとなっています。 ソースコードは、以下の通りです。
Rails.application.routes.draw do
  # For details on the DSL available within this file, see https://guides.rubyonrails.org/routing.html
  get 'hello/index'#ルーティンの登録 https://localhost:3000/hello/indexを登録 helloはコントローラ名 indexはアクション名
  get 'hello', to: 'hello#index'#HelloControllerクラスのindexメソッドを呼び出している
  get 'hello/other'
  post 'hello/index'
  post 'hello', to: 'hello#index'
end
getでアドレスにルーティングを登録しています。
postは、アクセス許可をするために記述します。また、データを新規登録するアクションでも使用します。
おわり
作ってみて、こんだけのファイルを管理するのは大変だと感じましたが、一個一個は簡単だと感じました。 hello_controller.rbの中身を変更すると、自分好みのアプリを制作できると思います。少しでも参考になれば、幸いです。 個人的には、ログイン画面を追加したいと考えています。
参考文献
- 掌田津耶乃 Ruby on Rails6 超入門 秀和システム 2020年発行
- 【Rails入門】ルーティング 閲覧日2020-11-30 https://www.sejuku.net/blog/13078
- scssの基本的な書き方 閲覧日2020-11-30 https://qiita.com/nchhujimiyama/items/8a6aad5abead39d1352a
- Railsのimage_tagの使い方を現役エンジニアが解説【初心者向け】 閲覧日2020-11-30 https://techacademy.jp/magazine/22075